Every Monday, Paul tells me he is besieged by friends who have desperately been searching the blog all weekend for updates on the addition. Where are the pictures? The news? THE ACTION? Either Paul has become the temple to Do-It-Yourself-ers, eager to believe that they, too, can build a house, OR these are people who know us really well and understand that with us, “home renovation” and “comedy” are synonymous.
My guess is that the last category is correct. Which is why no one reading this will be surprised when I say we’re having trouble with plumbing.
No, it’s not as bad as the time we left town for a few days and a valve burst and ran water so hard and so long that it soaked through the brick, making a dripping 8-by-10 foot wet shape on the side of the house (it was totally the image of the Virgin Mary, but we didn’t get the right press involved… damn). And it’s not as bad as the time we left town, again, and another valve burst and the water ran and ran so hard that it… (yes, that’s right, it happened to us TWICE). It was a bit touching though, watching the water-disaster clean up crew help empty out the basement. Two feet of water had filled, floated, and bloated the wood on dozens of pinball machines and video games. So grown men were literally choking back tears over concern that Q*bert or Funhouse wasn’t ever going to be playable again. (The electronics were fine, the wood was ruined.)
Then there was that time in Michigan when Paul was installing the washer and we heard a pipe clank and the sound of water pouring in the basement all over the pinball machines. (Those games have been through a lot.)
Then here in New Orleans, we burst the water supply pipe while installing the hallway bathroom sink at around 12:03am, the night before Paul was about to leave on a big business trip. Best part: all of our towels were wet in the washing machine. I ended up running for sheets and t-shirts to sop up the 2-inches of water off the floor. Good times.
So, why would we even think of doing plumbing ourselves? I have no idea. Granted, we DID build a damn fine bathroom in Michigan and Paul did all that plumbing. But apparently, his talents end with 1/2″ pipes. The 3/4″ pipes on old homes (like ours) do not apply. He’s had a rough week. Still, we can claim a victory:
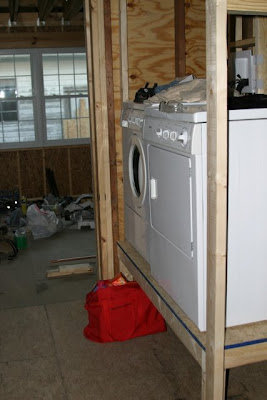 We DO have laundry! Paul managed to get the water working and functional… and then we heard an explosive sound from under the house. Uh-ho. So the update: we have COLD water laundry working. Hot water will come later. But a plus: Paul’s beautifully organized and thoughtful design has made it so that we can turn off sections of the house’s water — so he can work on the plumbing in the back without impacting the front. Hooray for no longer having to shut down the whole house for hours and hours!
After conversing with a couple of plumbers, Paul actually thinks he can fix the current problems. Of course I believe him. Really, I do. How can you not believe in a guy whose butt is that cute? Still, with so much left to do and time running out, we may hire a plumber friend to finish the hot water and finish the final hook-ups for the tub. I think Paul is still vested in doing the shower plumbing installation himself… stay tuned.
In the mean time… Paul built the deck for the tub (below). That’s the tub in the background.
Here’s the tub story… we went to a local plumbing supplier a few weeks ago to check out the showroom and get a few manufacturer catalogs. Loads of online research of installation guides and rough-ins follows. We made some basic choices, compiled questions, and made an appointment with the guy identified as ‘the one who knows showers the best’ since we needed to order the shower valves and trim right away. Hal was great; we hit it off with him right away, he instantly understood our level of understanding of the products and was able to help us without a blink. We got to talking in between our walking around and questions and ended up telling him our story of how we decided to stay in New Orleans and the things that we have done since committing to be a part of the city’s rebirth. At one point, I got a little choked up talking about when we realized how we couldn’t leave this place, and apologized — only to look up and see that he was reacting the same way. It was a little New Orleans’ moment… followed by another. He himself was a born-and-raised New Orleanian and was so thrilled by our enthusiasm for the city that he went into action wanting to help us. He worked out a great discount for all our products (cheaper than Lowe’s). Then, as we were showing him the tub we were thinking of getting, recalled that the warehouse across the street may have had one outside, a return, and maybe we could get it as much as half off? He called his boss. 10 minutes later, we’re in the back of the outdoor warehouse storage area looking at tubs. The initial bare-bones air tub (still a $1700 tub) was too beat up for us to really want to spring for… but right around the corner? A brand-new tub by the same manufacturer. Back to the showroom to check out the details… it’s an Amma model, a very, very, very nice tub. It was BRAND NEW… it was returned to the warehouse the morning before (contractor mis-measured). We bought it on the spot, delivered to or front room the next day for a quarter of the discounted sale price. The icing on the cake was that Hal kept saying that he wished he could do MORE, which was amazing since he had done so much for us already just by being so helpful and friendly. We feel certain that our Karma was all used up that day, explaining why the plumbing went so wrong the following weekend.
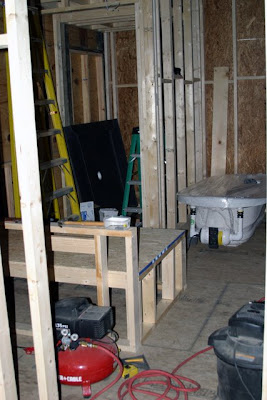 Another view of the tub deck. That knee-wall separates the tub deck from the toilet area. The shower is in the far upper area of the picture. The tub faucet will mount in the front.
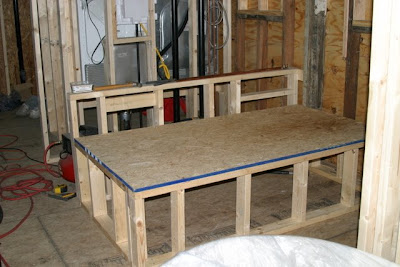
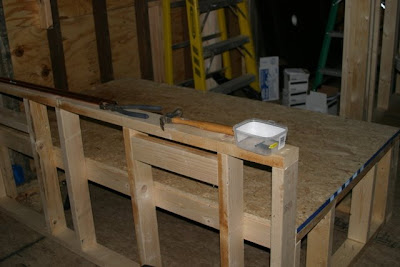 Another view of the tub deck.
 Here is the back of the washer/dryer. Paul built a platform for them to sit on so that there is no bending when we do laundry (exciting!) Also, Scout’s liter box will go underneath… we’ll put a little swinging access door between the two studs furthest to the left.
 On Tuesday, we ordered a vanity for the bathroom… it will arrive in about 2 1/2 weeks. The question is whether we can get insulation and drywall in before it arrives… We hope to order tile next week.
—
*Never buy a house with polybutylene piping (no, we didn’t qualify for the lawsuit because the valves burst, not the pipe).
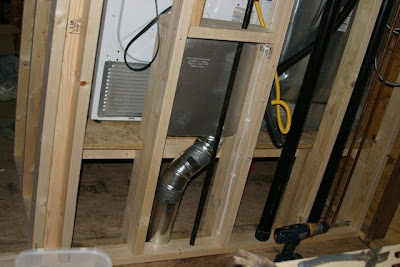
 Looking up over the tub. Paul framed this out so that there would be room for the venting for the A/C and heater.
 Some detail on Paul’s roofing/framing in the new section.
 More detail in roofing/framing. AND, the mechanisms to hang the panel door going into the study from the porch/family room. We’re going to hang the door that currently separates our bedroom and bathroom here as a panel door … and are on the hunt for old french doors. Saw one that we loved at The Bank… but it’s match was gone.
 We have Air Conditioning!!! The new A/C is to the left (duh) and is for the back of the house. Paul did a great job building the platform. The crew that installed the compressor said that it was, bare none, the absolute best hook-up they had ever seen. This is the trend now that we are subbing out projects… everyone who comes to give an estimate about falls over at the quality of the work, are dumbfounded when Paul explains it was all him, and then offer him a job.
 More details of the platform and hook-ups.
 Finishing framing above the storage area in the laundry room.
 Paul was really proud of this job — it just came together perfectly.
 See the air vents? Paul is embarrassed that all the studs don’t line up and would want me to say that.
 Detail of drop ceiling above master bath.
 Porch/study venting.
 Blocking edges to prep for drywall hang.